Roll Your Own SATA Page 2
Guide and photos by Rick Stephens
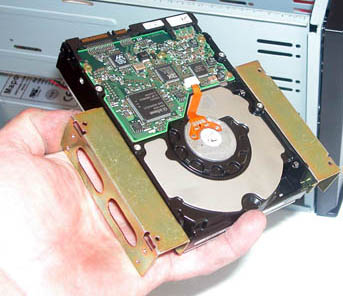
First thing to do is attach adapter brackets to each hard drive.
NOTE:Static discharge can destroy computer components!
Your new hard drives are quite capable of becoming inert paperweights with an unfelt static discharge. Practice good static prevention habits. Discharge yourself against a grounded chassis or pipe before handling your drives. Try not to walk around while carrying components like drives without returning them to their antistatic containers or sleeves. Be certain to use proper procedures whenever you are working inside a computer or with components like hard drives.
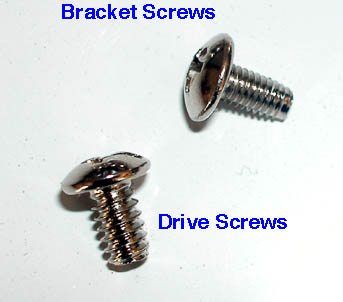
In your enclosure you will have packages of screws that contain more than enough drive screws but you are going to have to separate them from your enclosure bracket screws. The picture below shows the difference between those screws. Use only the 6-32 coarser threaded screws to attach brackets to drives.
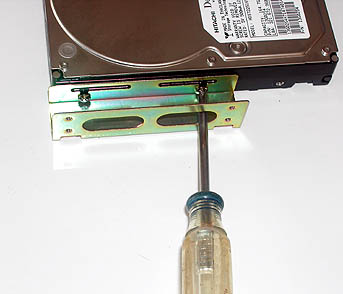
Install brackets on the rear of the drives, at the opposite end from the connectors. We usually use a magnetic tip screwdriver to reach the screws into the brackets, but have to switch to something smaller when tightening the screws.
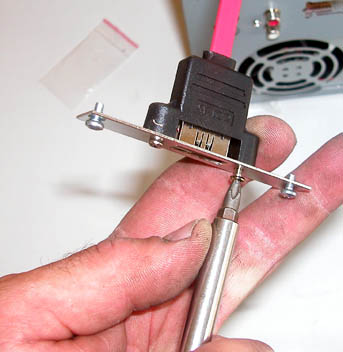
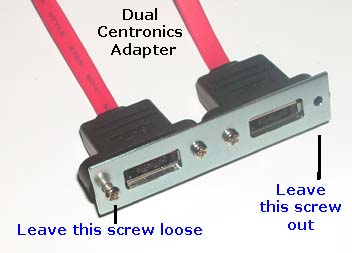
Next, attach the Centronics Adapter Plates to each internal SATA jumper cable.
On some Kits you will receive some double cable adapter plates since there are not enough backplane cutouts for the number of cables needed. The cable attachment screws also serve to attach the plate to the backplane. Leave on out and the other outside one loose to ease installation.

The Gurus Certify These Instructions Work!
Related Pages

